
In This Article
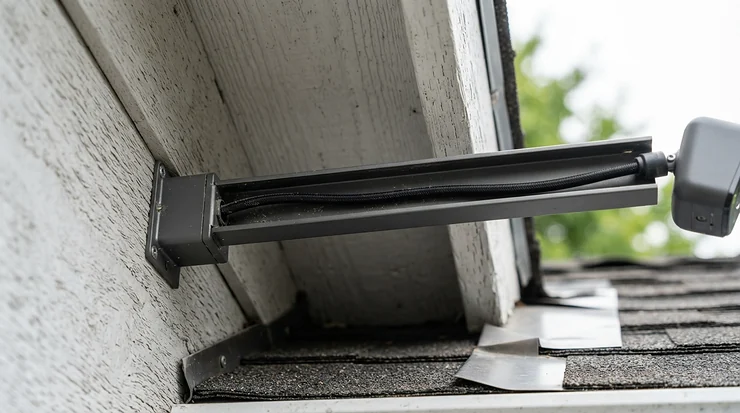
Outdoor camera mounting accessories for gutters and eaves are the clamps, brackets, and adapters that hold a security camera at roofline height. Some grip a gutter lip, others fasten to an eave or soffit. They give you elevated coverage without drilling into siding, and they decide whether your camera records faces or just shingles.
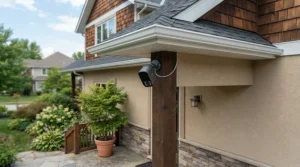
Here’s the thing the box never tells you. The camera gets the glory, but the bracket does the work. A flimsy clamp sags after the first windstorm. A badly chosen angle turns a 2K camera into a very expensive sky recorder. And a rain gutter was engineered to move water, not to carry hardware, so the mount has to respect that thin metal lip rather than fight it.
Mounts are cheap, which is why people treat them as an afterthought. Then the camera tilts toward the lawn, the solar panel sits in shade, and the “no-drill” install becomes a weekend of ladder regret.
This guide fixes that. You’ll get seven real mounts, honest analysis of what their specs mean in practice, and clear advice on camera mounting height and angle. I also cover when a pole mount adapter beats a roofline bracket, and how to avoid the classic mistakes.
One note on method. I built this from spec sheets, retailer listings, and installer guidance gathered in late 2026, not from bench-testing every bracket. Where verified review data was thin, I say so.
Quick Comparison of Outdoor Camera Mounting Accessories for Gutters and Eaves
Seven mounts, one glance. Prices are ranges from listings I found, so check current price before buying.
| Product | Mount Type | Listed Compatibility | Price Range | Best For |
|---|---|---|---|---|
| Wasserstein Blink Gutter Mount | Clamp-on gutter | Blink Outdoor, XT, XT2 | Low-to-mid $20s (2-pack) | Blink owners wanting a no-drill roofline spot |
| Wasserstein 2-in-1 Universal Gutter Mount | Gutter, camera plus solar panel | Wyze, Blink, Ring, Arlo, Eufy | Roughly $35-$45 | Solar camera setups needing one anchor point |
| PLZRMBME Gutter Mount | Clamp-on roof edge | Eufy SoloCam S340/S330/E30, Arlo, Blink XT3, Wyze | Typically under $20 | Budget buyers with a 1/4″ thread camera |
| Koroao Gutter Mount | Clamp-on gutter | Tapo C320WS/C310/C325WB, DEKCO solar models | Typically under $20 | Tapo and DEKCO owners |
| Wasserstein 360° Swivel Camera Mount | Swivel wall/eave | Blink, Ring Stick Up, Arlo, eufyCam | Mid-$40s (2-pack) | Fine-tuning angles on a fixed surface |
| OkeMeeo Eave Mount | Soffit/eave | Ring, Blink Wired, Wyze floodlight cams | High-$20s to mid-$30s | Wired floodlight cameras under the eave |
| Speco POL28DW Pole Mount Adapter | Pole/post | Outdoor CCTV and PTZ | High-$30s | Yard poles and freestanding posts |
Read the table as a decision tree, not a leaderboard. Three of the seven are gutter clamps, and they are not interchangeable. The compatibility column is the one that matters. A gutter mount built around one camera’s screw pattern can be useless for another, however good the metal is.
If you own a wired floodlight camera, skip straight to the OkeMeeo Eave Mount, because nothing else in this list fits that hardware. If you’re renting and can’t drill, the clamp-ons are your friends. And if your only available structure is a fence post or a metal pole, the Speco POL28DW Pole Mount Adapter solves a problem the others can’t touch.
💬 Just one click — help others make better buying decisions too!😊
Top 7 Outdoor Camera Mounting Accessories for Gutters and Eaves: Expert Analysis
Each pick below gets the spec translated into real-world meaning, an honest take on who it suits, and a straight statement of what review evidence I could and couldn’t verify.
1. Wasserstein Blink Gutter Mount — best for Blink owners going no-drill
The headline here is the angle lock. The listing describes a mount that holds your chosen angle firmly, which matters more than it sounds. A mount that slowly droops under a camera’s weight will gradually point your lens at the ground.
This one ships as a two-pack with a universal screw adapter, designed around Blink Outdoor, XT, and XT2 cameras. In practice, that pack lets you cover two corners of the house for the cost of one premium bracket. Generation matters, though. Confirm your exact Blink model against the listing before ordering, because newer Blink versions have different housings.
Based on the spec comparison, this suits renters and anyone who dislikes puncturing fascia boards. Clamping to the gutter also sets the camera at roofline height, which is great for driveway coverage but can run too high for faces on a two-story home (more on that in the height section).
Review evidence is thin. I couldn’t verify enough underlying review text to summarize sentiment responsibly, so treat any star average you see as directional only.
Pros:
- ✅ Two-pack covers multiple house corners
- ✅ Angle lock resists gradual drooping
- ✅ No drilling into fascia or siding
Cons:
- ❌ Model-specific; verify your Blink generation
- ❌ Roofline height can be too high on two stories
Price range: low-to-mid $20s for the pair. Good value if it matches your camera, wasted money if it doesn’t.
2. Wasserstein 2-in-1 Universal Gutter Mount — best for solar camera setups
Solar cameras create a puzzle that regular mounts ignore. The panel wants to face the sun. The camera wants to face the driveway. Those two directions rarely agree.
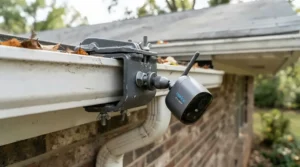
This mount is built to hold a camera and a solar panel, with listed compatibility across Wyze, Blink, Ring, Arlo, and Eufy. What the spec sheet won’t tell you is how independently the two positions can be adjusted. Check that before buying, because a shared clamp that forces both to face the same way defeats the purpose.
The universal pitch is both its strength and its caveat. It works across brands, which is lovely for mixed households. But “universal” usually means a standard 1/4″ thread, so cameras with proprietary mounting studs may need an adapter.
My analytical take: this is the right buy if you run a solar camera on a north-facing wall and need the panel elsewhere, since a gutter on a sunnier side of the house may give the panel better light. Reviewers on retail listings generally frame mounts like this as easy to install, but I couldn’t verify review text for this exact listing, so I won’t claim a consensus.
Pros:
- ✅ Handles both camera and solar panel
- ✅ Cross-brand listed compatibility
- ✅ Separates panel placement from lens placement
Cons:
- ❌ Pricier than single-camera clamps
- ❌ Proprietary studs may need adapters
Price range: roughly $35-$45. Worth it for solar users, overkill for battery-only cameras.
3. PLZRMBME Gutter Mount — best budget option for 1/4″ thread cameras
Cheap mounts have a reputation for bending. This one leans on metal construction, and listings describe it as stainless steel, though one listing mentions alloy steel with a nylon component. That inconsistency is a reminder to read the exact listing before buying, because material changes with variants.
The listed compatibility is wide: Eufy SoloCam S340, S330, and E30, plus Arlo, Blink Outdoor XT3, and Wyze Cam. The common thread is the standard 1/4″ screw, so if your camera has that thread, this mount can probably hold it. A listing also advertises a lifetime replacement guarantee. Nice on paper, but verify the terms with the seller, since guarantees from small brands are only as good as their support responsiveness.
Here’s what to weigh. Stainless steel resists rust, which matters on a gutter that’s constantly wet. But the mount only holds as well as the gutter it clamps to. Flimsy aluminum or vinyl gutters can flex, so anchor near a gutter hanger where the structure is strongest.
I couldn’t verify solid review text for this brand, so no sentiment summary here. The value case rests on specs and price alone.
Pros:
- ✅ Rust-resistant metal construction
- ✅ Wide 1/4″ thread compatibility
- ✅ Listed lifetime replacement guarantee
Cons:
- ❌ Material descriptions vary between listings
- ❌ Little verified review evidence
Price range: typically under $20. Check current price, since this category moves quickly.
4. Koroao Gutter Mount — best for Tapo and DEKCO owners
Brand-specific mounts earn their keep through fit. This one targets Tapo C320WS, C310, and C325WB cameras, plus DEKCO solar models like the DC4L, DC5L, and DC9L. If you own one of those, a generic bracket may leave you improvising.
The standout is the nine mounting holes. That sounds like trivia until you realize it’s what makes fit across several camera bases possible. More holes means more bolt patterns, so you’re less likely to hit the “almost fits” wall. The listing describes white aluminum construction that’s easy to adjust and reposition.
A word of warning: Tapo’s pan-and-tilt models, like the C500 and C520WS families, are listed under a different mount from another seller entirely. Fixed-lens and pan-tilt cameras don’t share hardware, so don’t assume “Tapo” covers every model.
For buyers who mostly want a roofline view of a driveway, this is the straightforward pick. I couldn’t verify review text for it, so I’m leaving sentiment out rather than guessing.
Pros:
- ✅ Nine holes fit multiple camera bases
- ✅ Lightweight aluminum build
- ✅ Easy to reposition without tools
Cons:
- ❌ Wrong for Tapo pan-tilt models
- ❌ Aluminum may flex on thin gutters
Price range: typically under $20. A solid budget pick if your model is on the list.
5. Wasserstein 360° Swivel Camera Mount — best adjustable swivel bracket
This is the tweaker’s tool. The 360° swivel lets you aim a camera precisely after it’s already fixed in place, which is the difference between “close enough” and “exactly covering the side gate.”
Listed compatibility is broad: Blink Outdoor and XT, Ring Stick Up Cam (battery and wired), Ring Outdoor Cam Plus, Arlo Essential Spotlight, Pro 3, 4, Ultra and Ultra 2, plus eufyCam 2 and Pro. It ships as a two-pack, so you can cover two zones.
What the spec sheet won’t tell you, but common sense does, is that swivel range means little without lock strength. A loose ball joint on a windy eave will slowly drift. Tighten firmly, then recheck after the first storm.
This mount fits best where you want flexibility after install, such as a rental or a property where blind spots keep shifting as you learn the foot traffic. I couldn’t verify detailed review text for this listing, so I won’t summarize sentiment.
Pros:
- ✅ Fine aiming after the mount is fixed
- ✅ Broad cross-brand compatibility
- ✅ Two-pack covers two zones
Cons:
- ❌ Joint can drift if under-tightened
- ❌ Higher price than basic clamps
Price range: mid-$40s for the pair. Good if you value precise aiming, steep for simple fixed views.
6. OkeMeeo Eave Mount — best eave bracket for floodlight cameras
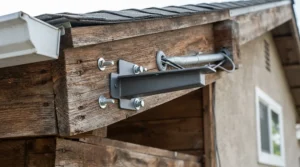
Floodlight cameras are heavy, wired, and fussy about where they sit. This ABS mount targets Ring Floodlight Cam Wired Plus and Pro, Blink Wired Floodlight, Wyze Floodlight V2 and Pro, and Roku floodlight models. It’s described as a 90-degree soffit mount.
The key caveat is a loud one. Listings state it’s not compatible with the Ring Floodlight Cam Plug-In versions or the Blink Outdoor 4 Floodlight. That one line prevents a very annoying return.
ABS plastic won’t rust, but it can become brittle with years of UV exposure. For a camera that sits under an eave out of direct sun, that risk is smaller. Under open sky, it deserves a periodic look.
Retail listings I found show star averages around 4 or higher on modest review counts, but those listings are inconsistent and I couldn’t verify the review text, so treat that as a mild positive signal, not a verdict.
The eave position is a smart pairing with floodlights, since the light washes down the wall and the overhang shelters the electronics.
Pros:
- ✅ Purpose-built for wired floodlight cameras
- ✅ Rust-free ABS material
- ✅ Eave placement shelters electronics
Cons:
- ❌ Incompatible with plug-in floodlight versions
- ❌ Plastic may age under strong UV
Price range: high-$20s to mid-$30s. Fair value for a niche, fit-critical part.
7. Speco POL28DW Pole Mount Adapter — best for freestanding poles
Not every property has a convenient roofline. Sometimes the best vantage is a pole near the driveway, and that’s where a pole mount adapter earns its keep.
The Speco POL28DW is an outdoor pole adapter with cable feed-through and a listed VESA 400 x 200 mounting pattern, aimed at CCTV and PTZ cameras. Cable feed-through matters more than it sounds, because a hidden cable run is harder to cut or snag.
One caveat: listings disagree on weight capacity. One says up to 25 lbs, another says up to 10 lbs. Verify with the seller before hanging anything heavy, since a PTZ dome weighs far more than a small bullet camera.
Also, listings note a bracket may still be required to attach your actual camera. This is an adapter, not a complete solution. It’s a professional-grade component, so expect a “you assemble it” experience rather than plug-and-play.
I found no reviews on the retail pages I checked, so I can’t summarize customer sentiment. The case rests on the spec and the Speco name.
Pros:
- ✅ Cable feed-through hides wiring
- ✅ Designed for outdoor CCTV use
- ✅ Handles pole installs roofline mounts can’t
Cons:
- ❌ Conflicting weight capacity listings
- ❌ May need a separate camera bracket
Price range: high-$30s. Best for installers and ambitious DIYers.
Practical Usage Guide: Installing a Gutter Mount for Outdoor Security Camera Setups
Amazon listings tell you the mount exists. They rarely tell you how to make it last. Here’s the field-tested sequence.
Before you climb. Hold the camera against the spot from ground level and check the live view on your phone. Walk the area you want covered. Ten minutes here saves a ladder trip.
Clamp placement. Position the clamp near a gutter hanger or support spike where the gutter is rigid. The span between hangers flexes. A clamp there will tilt as the gutter shifts with ice, leaves, or a stray ladder.
Cable and strain. For wired cameras, leave a small drip loop so rain runs off the cable instead of down into the connector.
Tighten in stages. Snug first, aim, then final-tighten. Overtightening thin aluminum can deform it.
First-30-day mistakes to watch for: forgetting to retest after a storm, letting leaves pile up around the clamp, and ignoring that a solar panel may be shaded as the sun’s angle shifts through the seasons. Recheck at one week, then monthly for a quarter.
Maintenance schedule. Twice a year, and after major storms, check clamp tightness, rust spots, and cable wear. This takes five minutes with a screwdriver. Skip it and the first sign of trouble will be a missing camera.
Ladder safety isn’t optional. Use a spotter, keep three points of contact, and don’t lean sideways to reach. No camera angle is worth a fall.
Real-World Scenarios: Matching Mounts to Real Homes
Specs are abstract. Houses are not. Here are three profiles, with budget, environment, and frequency of use baked in.
The renter with a Blink camera. Budget: around $25. Single-story rental, no drilling allowed, checks the app daily. The Wasserstein Blink Gutter Mount fits cleanly, comes in a pair, and leaves no holes behind. The trade-off is that the roofline may sit high, so angle the camera down firmly to catch faces at the door.
The homeowner with a solar camera on a shaded wall. Budget: $40. Two-story colonial, detached garage, wants driveway coverage. The Wasserstein 2-in-1 Universal Gutter Mount lets the panel catch light while the camera watches the driveway. The reasoning: a shaded wall starves a solar panel, so separating the two is the real upgrade.
The rural owner with a long driveway. Budget: $60-$100. A gutter won’t reach the entrance gate 150 feet away. A post, plus the Speco POL28DW Pole Mount Adapter, creates a vantage where no roofline exists. Plan for power or a solar solution, and for the extra hardware the adapter doesn’t include.
The pattern is clear: location drives the mount, and the mount drives the camera choice, not the other way around.
✨ Don’t Miss These Exclusive Deals!
🔍 Take your home security to the next level with these carefully selected mounts. Click on any highlighted item to check current pricing and availability. The right bracket will help you build a camera setup that actually covers what matters!
Problem → Solution: Fixing the Five Most Common Roofline Camera Headaches
Every roofline install runs into the same handful of issues. Here’s how to solve each.
Problem 1: Constant false alerts from swaying branches. Roofline height gives a wide view that includes trees. Solution: tighten the angle downward with a mount like the Wasserstein 360° Swivel Camera Mount, then use your camera’s activity zones to mask foliage.
Problem 2: Rain streaks or glare on the lens. Mounts that sit flush against a wet gutter can invite splash. Solution: an eave position, as with the OkeMeeo Eave Mount, shelters the camera from direct runoff.
Problem 3: The solar panel stays shaded. An overhang can block the sun for most of the day. Solution: separate panel and camera, as the Wasserstein 2-in-1 Universal Gutter Mount allows.
Problem 4: The camera points at the sky. Too much upward tilt happens when the mount can’t angle downward enough. Solution: pick a swivel bracket with a wide tilt range, and test from the ground before final tightening.
Problem 5: Wind sway ruins footage. Loose joints amplify motion. Solution: choose a rigid mount, tighten fully, and place it near a gutter hanger. A budget option like the Koroao Gutter Mount or PLZRMBME Gutter Mount works when properly anchored.
Most “mount problems” are really placement problems wearing a disguise.
What Is a Gutter Mount for Outdoor Security Camera Use?
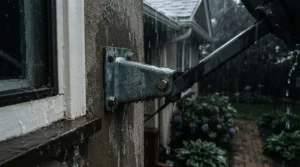
A gutter mount for outdoor security camera use is a bracket that clamps onto the lip of a rain gutter and holds a camera at roofline height. It requires no drilling into the house, and most designs allow tilt and swivel adjustment so you can aim the lens.
That definition hides a few important details. First, the “no drill” promise really means “no holes in your siding.” The clamp still depends on the gutter’s strength. Second, the clamp’s opening has to fit your gutter’s profile. K-style, half-round, and vinyl gutters differ in thickness and shape, so check the listing’s stated range.
Third, gutter mounts shine in rentals and in situations where you want to move the camera later. Move it in minutes, patch nothing.
Where they struggle is in extreme heights and in wind-exposed corners. A gutter mount puts the lens roughly where the roof meets the wall, which is often higher than ideal for identification shots. We tackle that tension in the height section below.
How to Choose Outdoor Camera Mounting Accessories for Gutters and Eaves
Follow these seven steps and you’ll avoid most buyer’s remorse.
- Confirm exact camera compatibility. Match your model number, not just the brand. A mount made for one generation may not fit the next.
- Check the thread standard. Most universal mounts use a 1/4″ screw. Proprietary studs need adapters.
- Identify your surface. Gutter lip, soffit, fascia, or pole each need a different mount style.
- Weigh your camera. Floodlight cameras and PTZ domes are heavy. Light bullet cameras tolerate clip-style hardware.
- Prioritize adjustability. Look for tilt and swivel range, because your first aim is rarely your best.
- Consider material. Stainless steel and aluminum resist rust. ABS plastic resists corrosion but ages under UV.
- Plan for solar. If you use a solar camera, decide where the panel will live before choosing a mount.
The reasoning behind all seven: a mount is a compatibility problem first and a quality problem second. A premium bracket that doesn’t fit is worth nothing, while an inexpensive one that fits correctly does its job quietly for years.
Eave Mounting Bracket for Outdoor Camera Installs: What the Overhang Really Offers
An eave mounting bracket for outdoor camera use fastens to the underside of the roof overhang, so the camera hangs beneath the eave rather than perched on a gutter. The eaves are the edges of the roof that overhang the walls, and that overhang is both the opportunity and the constraint.
The upside is shelter. A camera tucked under an eave sees less rain, less snow, and less direct sun on its lens. That helps with glare, ice buildup, and the long-term wear on weatherseals.
The downside is geometry. A soffit-mounted camera looks outward and downward from a high point, which can create a steep viewing angle toward anything close to the wall. Someone standing right at your front door may appear only as the top of a head. Mounting a short distance out from the wall, or choosing a bracket with an angled arm, helps.
Material matters here too. The OkeMeeo Eave Mount uses ABS plastic, which suits a shaded overhang. Metal options hold up better where sun and weather hit directly. And never skip the fastener question: soffits are often thin vinyl or aluminum, so screw into the solid framing behind it, not just the panel.
Adjustable Swivel Bracket Choices: Why Aim Flexibility Is Worth Paying For
An adjustable swivel bracket is the difference between “installed” and “installed correctly.” Your first guess at the angle is almost always wrong, and the bracket decides how painful the correction is.
Three things matter. Range: a full 360° pan and a generous tilt let you aim anywhere without relocating. Lock strength: the joint must hold against wind and the camera’s weight. Ease of adjustment: a bracket requiring a toolbox for every tweak will leave you tolerating a bad angle.
The Wasserstein 360° Swivel Camera Mount is the clearest example in this roundup, built around the idea that aiming should remain easy after installation. Clamp-style gutter mounts like the Wasserstein Blink Gutter Mount also offer angle adjustment, though typically a narrower range.
Reasoning to apply: if your camera covers a fixed doorway, a simple mount is fine. If your camera watches a changing scene, like a yard where you’re still learning where people walk, a flexible adjustable swivel bracket pays for itself.
Lastly, recheck tightness after the first week. Thermal expansion and wind loosen joints more than most people expect.
Pole Mount Adapter Options: When a Post Beats a Roofline
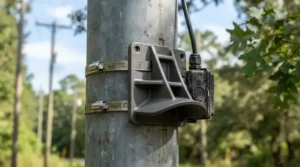
A pole mount adapter converts a standard camera mount for use on a pole, post, or mast. It matters when your best vantage point has no roof above it: a gate post, a fence line, a free-standing driveway pole.
The Speco POL28DW Pole Mount Adapter illustrates the category. It includes cable feed-through and a VESA-style pattern aimed at CCTV and PTZ gear, which suits larger professional cameras better than small consumer ones.
Weigh three considerations. Diameter: confirm your pole’s size against the adapter’s strap or clamp range. Capacity: as noted earlier, listings for this model disagree, so confirm before mounting a heavy dome. Cable routing: a pole gives you an opportunity to hide wiring inside the mount, which beats a dangling cable.
Pole installs also bring something roofline mounts don’t: freedom from the house’s geometry. You can choose a height, distance, and angle that fit the scene rather than the architecture. The trade-off is power. Without a nearby outlet, you’re relying on batteries, solar, or running cable underground, and each adds cost and planning.
Camera Mounting Height and Angle: Getting the Geometry Right
If you remember one section of this guide, make it this one. Camera mounting height and angle determine whether your footage is evidence or décor.
Installer guidance consistently lands on a sweet spot. Reolink’s mounting height guide recommends roughly 8 to 10 feet for most residential cameras, with front doors a bit lower (about 7 to 9 feet) and driveways around 8 to 10 feet. Go higher and you gain tamper resistance but steepen the view, capturing hats and the tops of heads instead of faces.
The geometry is simple. Reolink’s illustrative figures assume a target about 5.5 feet tall:
| Mounting Height | Target Distance | Approx. Downward Angle | Best For |
|---|---|---|---|
| 8 ft | 6 ft | 23° | Front-door visitor identification |
| 10 ft | 6 ft | 37° | Too steep for faces; deterrence only |
| 10 ft | 15 ft | 17° | Driveway and yard coverage |
| 12 ft | 15 ft | 24° | Wide yard views from a high roofline |
The pattern is obvious once you see it. Close targets plus high mounts equals steep angles. A camera at 10 feet watching something 6 feet away looks nearly straight down. Move the same camera’s target out to 15 feet and the angle relaxes.
For gutters and eaves, this has a practical meaning. On a single-story home, the roofline often sits near that 8 to 10 foot band, which is great. On a two-story home, a gutter can be far above it. Putting your front-door camera up there will give wide scenery but weak faces, so use a lower wall or porch-ceiling spot for identification and reserve the high gutter for yard overview.
Gutter vs Eave vs Pole vs Wall: Which Mount Style Wins?
No single mount style wins everywhere. Here’s how they stack up.
| Option | Drilling Needed? | Typical Height | Weak Spot | Best For |
|---|---|---|---|---|
| Gutter clamp, like the PLZRMBME Gutter Mount | None into the house | Roofline | Gutter strength | Renters and quick repositioning |
| Eave bracket, like the OkeMeeo Eave Mount | Yes, into soffit framing | Under overhang | Steep close-in angles | Floodlights and weather-sheltered cameras |
| Pole adapter, like the Speco POL28DW Pole Mount Adapter | Depends on pole | Chosen freely | Needs power and planning | Gates, driveways, open yards |
| Swivel wall mount, like the Wasserstein 360° Swivel Camera Mount | Yes, into wall or fascia | Chosen within reach | Permanent holes | Precise aiming at set heights |
The table shows a trade-off between convenience and permanence. Clamps are fastest and reversible, but they borrow strength from your gutter. Fixed brackets are sturdier but leave holes behind. Poles offer total freedom but demand more planning.
My reading: choose the clamp for flexibility, the eave bracket for weather protection, the swivel wall mount for precision, and the pole for places no roof reaches. Many well-covered homes use two or three of these styles at once.
Common Mistakes When Buying Outdoor Camera Mounting Accessories for Gutters and Eaves
Most returns trace back to a few repeat offenders.
Buying by brand name alone. “Compatible with Tapo” or “works with Blink” hides model-level differences. The Tapo fixed cameras and pan-tilt cameras use different mounts, and the Koroao Gutter Mount targets only certain models.
Ignoring plug-in versus wired variants. The OkeMeeo Eave Mount is explicitly not for Ring’s plug-in floodlight versions. One word in a model name changes everything.
Mounting too high for faces. Guardian Alarm’s placement guide makes the same point: the 8 to 10 foot range balances wide coverage with enough detail to recognize people. A bird’s-eye roofline view rarely produces usable evidence.
Trusting “universal” blindly. Universal usually means a 1/4″ thread. Check your camera’s base.
Skipping the gutter check. A clamp on a sagging, rusty gutter is a fall waiting to happen.
Forgetting solar shading. Eaves and trees steal sunlight. Plan panel placement before drilling or clamping anything.
Fix these six and you’ll sidestep roughly everything that goes wrong in the first month.
Long-Term Cost and Maintenance: What These Mounts Really Cost You
A mount that costs under $20 sounds like a rounding error. The real cost is what happens when it fails: a dropped camera, a cracked lens, or a bracket that lets your view drift for months without you noticing.
Think in terms of cost per year of reliable coverage. A budget clamp like the PLZRMBME Gutter Mount might need replacement sooner than a premium mount, but at that price, you can swap it without much pain. A pricier option like the Wasserstein 2-in-1 Universal Gutter Mount pays off if it prevents solar-panel problems and a second purchase.
Maintenance is nearly free but easy to forget. Twice a year, check: fastener tightness, rust or corrosion, plastic cracking (especially ABS parts like the OkeMeeo Eave Mount), cable wear, and gutter condition. Add storm checks.
Replacement hardware is the sneaky expense. Stainless screws cost pennies and outlast zinc-plated ones in wet climates. Spend a few dollars on them and you’ll avoid weeping rust streaks down your siding.
Finally, count the labor. A mount that’s easy to adjust saves hours over its lifetime. That convenience is part of the price you’re paying.
FAQ
❓ Can I mount a security camera on a gutter without drilling?
❓ Will a gutter mount damage my gutters?
❓ How high should an eave-mounted camera sit?
❓ Do solar cameras need a separate panel bracket?
❓ What mount works best for a camera on a pole?
Conclusion
Outdoor camera mounting accessories for gutters and eaves look like boring hardware, but they quietly decide whether your security camera does its job. The right bracket holds its angle through storms, keeps a solar panel in sunlight, and puts the lens at a height that captures faces rather than rooftops.
Here’s the short version of what to buy. If you own Blink cameras and can’t drill, the Wasserstein Blink Gutter Mount is a natural fit. Solar camera owners should look at the Wasserstein 2-in-1 Universal Gutter Mount. Budget shoppers with standard-thread cameras can consider the PLZRMBME Gutter Mount, and Tapo or DEKCO owners should look at the Koroao Gutter Mount. If aiming flexibility is your priority, the Wasserstein 360° Swivel Camera Mount is the best fit. Floodlight camera owners need the OkeMeeo Eave Mount, and anyone mounting on a post should check the Speco POL28DW Pole Mount Adapter.
Above all, remember the geometry. Compatibility comes first, camera mounting height and angle come second, and everything else is detail. Measure twice, clamp once.
✨ Ready to Lock In Your Perfect Camera Spot!
🔍 Compare the mounts above, check current pricing and availability, and pick the bracket that matches your camera and your roofline. A few smart dollars here will protect your camera, your footage, and your weekend!
Recommended for You
- Battery Outdoor Security Camera for Renters No Drilling: 7 Best 2026
- Color Night Vision Outdoor Camera for Dark Rural Property 7 Best 2026
- Weatherproof Outdoor Camera for Extreme Cold Climates: 7 Best (2026)
Disclaimer: This article contains affiliate links. As an Amazon Associate, I earn from qualifying purchases. If you purchase products through these links, we may earn a small commission at no additional cost to you.
✨ Found this helpful? Share it with your friends! 💬🤗
